A Black Skirt

I’m still sneaking in time for shopping in between everything else, though we mainly shopped for the hubs and sarees for our Moms. However, I did poke into the women’s section and have a look at everything. I was about to turn back when my eyes fell upon a black skirt. It was a long, A-line skirt with a suede-ish texture to it. It looked something like this:


It also had a satin belt which is something I always fall for (satin = girly = yes,yes,yes!). The belt was not unlike this:
Image Courtesy: list4all


I luurrve skirts and have wanted a simple, no fuss, black A-line for the longest time, so why didn’t I buy it on the spot? I am a reformed shopper now, so I decided to take a week to think over it. As the case is, I can’t stop thinking about it now and keep imagining how I would style it.

So I promptly logged on to Polyvore and created three looks around a black skirt:

1. Classy and Elegant

Another thing I need (okay fine, want) is a leopard print scarf. I’m actually not one for animal prints, but after seeing here how it infuses instant glamour into an outfit, I’m warming up to it now.
2. Dressed down with denim

I like the yellow and green color combination. Not sure how ‘fall’ it is, but then just because seasonal fashion dictates so, doesn’t mean we have to drown in browns and burnt oranges and bottle greens, do we?
3. Vintage inspired pink

Another color combo I love: pink and black. The necklace inspired the whole vintage thing, and I put in the watch to bring out the blue in the necklace drop.


So all you stylistas out there, what do you think of my style combos? Should I go ahead and get that skirt? Do let me know!!!


This post is a participant in Monday Mingle, a fashion initiative hosted by Bonbon Rose Girls, MomTrends and Glamamom.

A Little Shopping and a Little DIY


I have been quite busy past few days and expect to get busier in the next few :-). That’s the thing about Ramadan, things come to a head in the last 10 days. Prayers intensify, the anticipation for Eid increases and of course, people spend a lot of time shopping for their Eid stuff!! I managed to sneak in a little shopping trip and this is what I got:


An aerial view:


  1. Berina Hair Spray – a brand I’ve never heard of, but it looks good (read: claims a lot of stuff :-)) and so I thought of giving it a try.
  2. Garnier Antiperspirant – They say it works well on waxed/shaved skin. Hmm…
  3. Lotus Matte Gel Sunscreen – I’m currently using a Lakme sunscreen which makes my skin all oily, ugh!! So I opted for a matte version.
  4. Maybelline Colossal Kajal – This was out of stock at all the stores I went to, but Mr. Tiger finally found me one!! Awww!!!
  5. Maybelline Lipsmooth Lip balm – They’ve got really pretty colors, I went for Cranberry Jam. Sounds yummy, I know!
  6. Garnier tinted eye roll on – I had the non-tinted one, but I didn’t find it very effective. Hoping for better with this one.
  7. And finally, those little elongated cones you see there, any guesses? Yup, mehendi cones!! After all, no Eid is complete without some henna on your palms!! 
A2part from shopping, I also made an attempt at some jewellery DIY. I love those satin bead necklaces, all bright colored satin and ribbons to tie them up, sooo girly!!

Anyway, I got myself some beads and satin ribbon and voila! Here is my creation:


What do you think? Not bad for a first attempt, eh? :-). But the finishing isn’t that good, if you look closely enough, you can see tiny threads popping out here and there. Can’t see them?? Ok, that’s enough, if you don’t see them, they aren’t there! :wink:

So have you guys got any successful jewellery DIY tales? Do share them, maybe I could get a few pointers!!

Eid Recipe - Biryani

Since Eid is coming up next week, I thought I’d post the recipe of the biryani that my family makes nearly every Eid. It’s basically my maternal grandmother’s recipe, and no one can beat her biryani till date!!

Disclaimer: This might appear to be a complicated recipe, but its not really that complicated, and hey, it is a biryani after all!!

What you’ll need (for 6 servings):

  1. 1 kg chicken – washed and drained of excess water
  2. ½ kg onions –thinly sliced
  3. ½ kg tomatoes – chopped
  4. 50 g green chillies – ground to a paste
  5. 2 whole garlic pods – ground to a paste
  6. 25 g ginger – ground to a paste
  7. 1 large bunch coriander leaves –coarsely chopped
  8. 2 limes - halved
  9. 4 cups short grain white rice  - washed and drained completely
  10. 8 cups of boiling water (for the rice)
  11. ¼ cup curd – whisked, so that it's smooth
  12. 2 tbsp ghee
  13. 2 tbsp + 2 tbsp Coconut oil (any other vegetable oil may be used, coconut oil would give it a more authentic taste)
  14. 1 tsp garam masala + little extra for sprinkling
  15. ¼ tsp turmeric powder
  16. 1” pc cinnamon stick
  17. 5 green cardamoms
  18. 5 cloves

What you’re going to do:

Part I – The Rice:

1. Heat a large thick bottomed pot, and pour in the ghee and 2 tbsp oil.

2. Fry the cinnamon, cardamoms and cloves for a few seconds.

3. Fry the rice in it till the grains begin to stick to one another.


4. Add the boiling water and salt. Stir well, and check the seasoning. It should be just a little bit salty.

5. Squeeze half a lime over the pot and cover and cook over low heat.


6. After 10 minutes, lift the lid and check to see if all the water has been absorbed by the rice. If yes, turn off the flame. If not, cover and cook for another 5 minutes and check again.

Part II – The Masala:

1. Heat a thick bottomed pot and add 2 tbsp of oil.

2. Fry the sliced onion on low heat till golden brown. (This could take some time; you can add a pinch of salt to speed up the process).

3. Add the chopped tomatoes and fry till completely mashed.

4. Add the ginger, garlic and green chillies pastes and fry till the raw smell disappears.

5. Add the garam masala, turmeric powder and salt to taste and stir well.

6. Add the chicken pieces and mix well. Cover and cook till the chicken is just done. There is no need to add extra water. (Do not overcook the chicken; it will turn all mushy in the end).

7. Turn off the flame and add the juice of half a lime, curd and 2 tbsp coriander leaves. Mix everything together.

Part III – The Finale:

1. Divide the cooked rice into 3 equal parts, and the chicken masala into 2 equal parts.


2. If you have a really big pressure cooker, very good. If not, find a big pot which can hold all the rice and chicken together. This is your biryani pot.

3. In the biryani pot, arrange one part of rice in a layer at the bottom.


4. Sprinkle a little garam masala, a tbsp of coriander leaves and then squeeze the juice of half a lime all over it.


5. On top of this, add one part of chicken masala in a layer.


6. Place the second part of rice in a layer above the masala layer.

7. Now repeat Step 4, followed by step 5 with the second part of chicken masala.

8. Now finally, arrange the last layer with the third part of rice, and again follow the same instructions as in step 4.

9. Cover with the pressure cooker lid with the gasket but WITHOUT the weight. If you are using a pot, cover with a tight lid, or seal a loose lid with dough made of flour and water.

10. Now comes the special equipment part – we use a flame distributor for the dum. It is basically a wire mesh which is placed on the flame, and the cooking pot on top of it. It helps the flame to be evenly distributed across the bottom of the vessel instead of concentrating at the middle. 

We place the Biryani Pot on top of the flame distributor and leave it on low flame till steam starts coming out of the cooker lid (for about 30 minutes).


11. Turn off the flame, remove the lid and serve.

 
You’ll notice a few major differences between other biryanis and this one:
  1. The use of coconut oil
  2. No mint leaves
  3. No basmati rice
  4. No garnishing (we let the biryani speak for itself!)
  5. Not accompanied by raitha
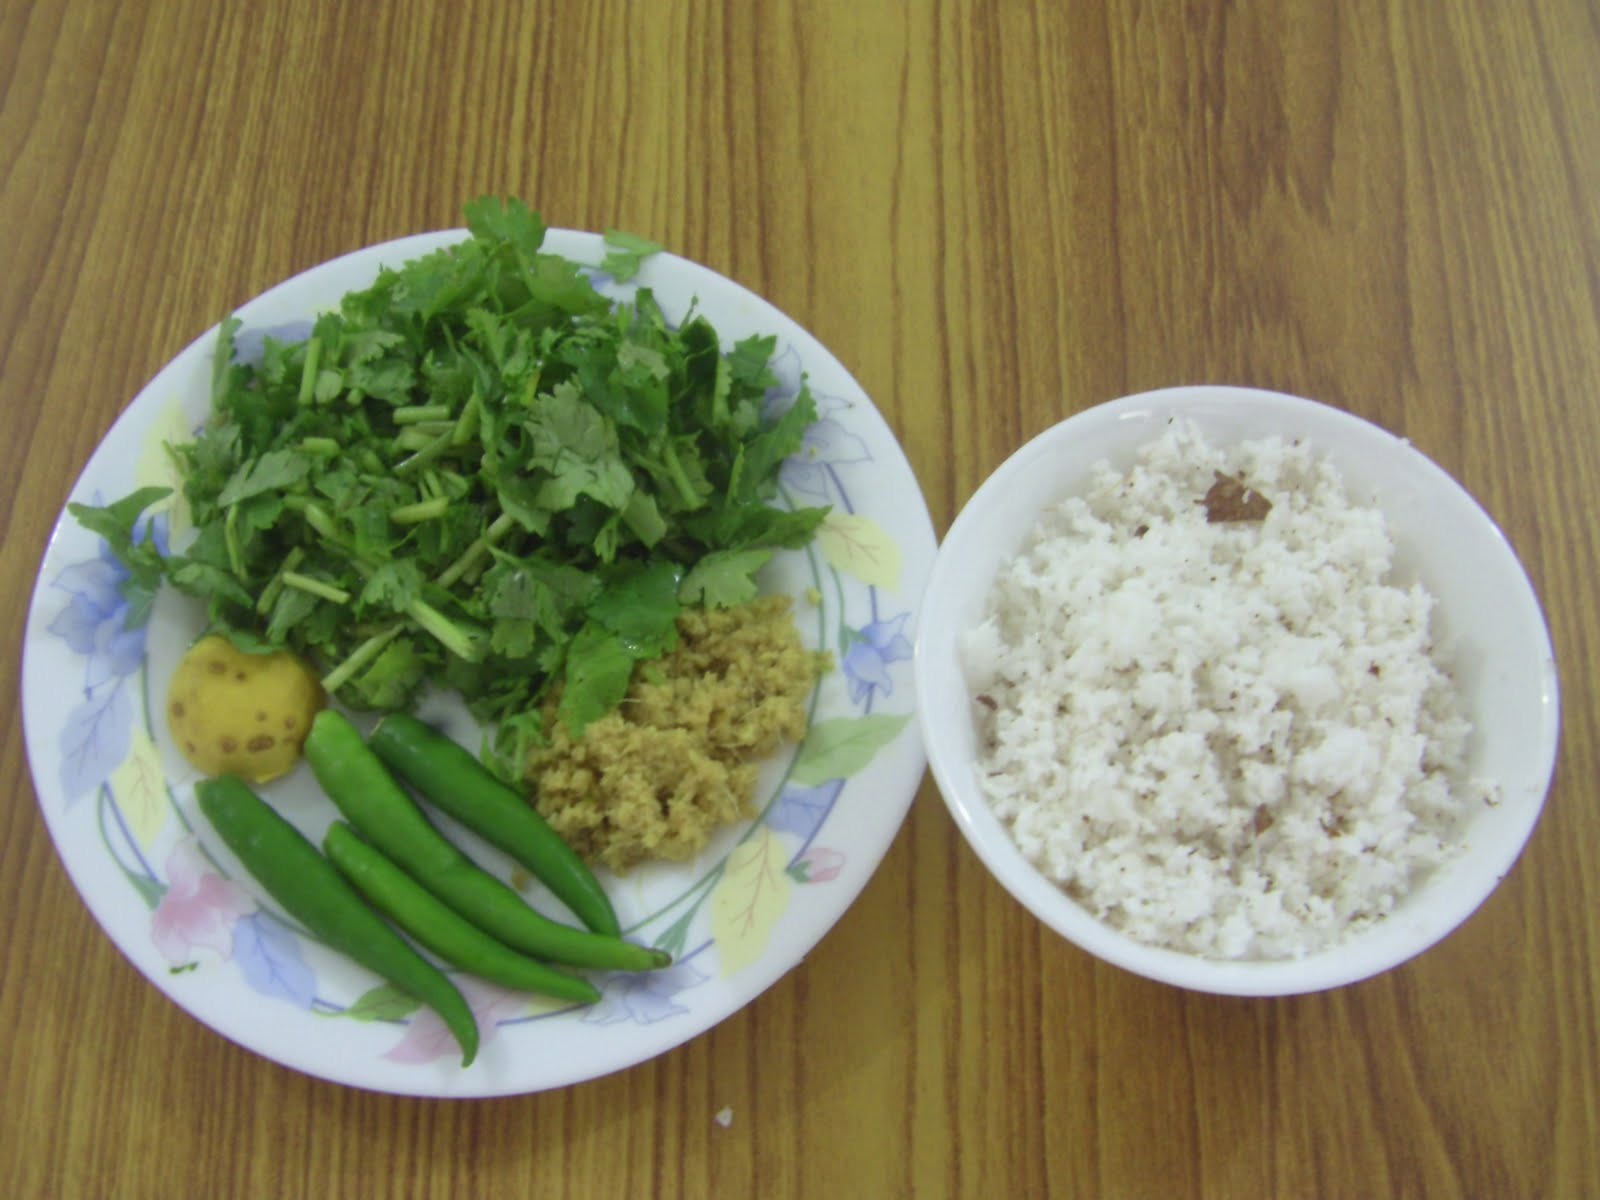
The traditional accompaniment to this biryani is green coconut chutney. The ingredients are listed below:

  1. 3-4 green chillies
  2. 25 g ginger paste
  3. juice of half a lime
  4. 1 cup chopped coriander leaves
  5. 1/2 coconut grated

Grind these to a fine paste and serve.


Usually the end of the feast is signaled by a small cup of lime tea – it is said to relax your tummy after such a heavy meal!!
For two servings:
  1. Boil two cups of water
  2. Put ½ tsp tea dust/leaves and boil for a minute. Turn off the flame.
  3. Add the juice of a quarter of a lemon and 4 tsp sugar and stir well.Strain and pour into little cups.

Whew!!! That was one lengthy post!! 3 recipes in one! I hope I haven’t scared you off with the numerous steps; it’s just that I wanted to be quite thorough especially for novices – everyone deserves to cook and relish a mouth watering biryani! Enjoy!!


This recipe is a participant for the ‘Eid Potluck Party’ event at Sadaf’s blog, ‘My Culinary Adventures’.


Candid Camera!


I know I’ve been a bad girl, slacking in my posts, but I’ve been quite busy what with Ramadan, and visiting and stuff. So today I thought, “Cub’s having a nap, I’ll sit down in front of my keyboard and just blog away to glory!!”. Alas, my help turned up with an injured hand, so now I’ll have to go do the chores as well :-(.Oh noooo!!!!!

Anyway, I thought I’d post some funny photos I’ve had with me for a while. Some have been taken by me, the rest contributed by my brother and his friend. Not sure where they got it from, though :-). Good for a laugh!!

1. Did it actually land there?


I’ll begin with a photo taken by yours truly. I honestly don’t know what the house owners were thinking when they built a plane on top of their house. Seriously, a plane?? 

2. Gentlemen first


Self explanatory :-)

3. Made by a Zero-x


It certainly was no 'hero' who made the sign!

4. Who says I’m heavy?


Again, self explanatory.

5. Chemistry graduate


Someone seriously paid attention in chemistry class :-)

6. Famous Brand I


This one’s quite good. People could actually be fooled at first glance.

7. Famous Brand II


This one’s not that good, but worth a mention anyway :-)

8. Born Less?


Honestly, couldn’t they ask someone before putting that up?

Hope everyone enjoyed this little candid camera action!! Ciao till next time!! 

Beautiful


Can you count the number of times that someone has told you that you are beautiful? Quite a few, right? Now how many times have you told yourself that? Hmm, not that many, I’m guessing.

For most of us women, it really takes an effort to actually admit that we are beautiful. How can we, when we have those thunder thighs, or that huge butt right? It is so much easier to find stuff to hate about ourselves.

Image Courtesy: cct300-f08.wikispaces


My sister and I look very different – I’m short and she’s tall; she’s skinny and while I’m within a healthy weight for my height, I’m tipping towards the upper limit :-). Sometimes we joke that it would be great if we had some kind of a machine where I could transfer some weight to her!! But when you think about it, if we really had a machine like that, we would all look like clones of each other (our celebrities are already beginning to look like that). Scary thought, right?

In India, the obsession with being skinny is not as much as it is in the west, but it does exist and affects a lot of young girls with impressionable minds. The media, of course is everyone’s favorite punching bag when it comes to this issue, and it is true that it plays an important role. Movies, ads, magazines - everything sends out the message that you need to be tall, thin, have lustrous straight hair, blemish free skin, a sexy pout and curves in the right places. What are these ‘right’ places? Who said they were right in the first place?

This is where blogging plays a huge positive role. We have bloggers of all shapes and sizes and colors who belong to various nationalities/ethnicities/religions and they are all, beyond doubt, beautiful. The one common characteristic all of them share is self love and a wonderful confidence that actually comes through in their pictures. I admit, I’m still a work in progress and have yet to accept parts of my ‘mommy’ body, but these wonderful people really inspire me.


Speaking of self love, I love the song ‘Beautiful’ by Christina Aguilera and believe every girl should listen to it (Of course, there are hardly any who haven’t :-)). Here’s the youtube link:


 Have you ever battled body image issues in your life? How did you deal with it?

Recipe for the Week - Fruit Custard

This is a really popular recipe, not to mention a healthy, fruit-filled dessert :-). You can use low fat cream, but it would be better to use whole milk for thicker custard. All the fruits need to be chopped into small pieces of the same size.

What you’ll need (6-7 servings):

  1. 4 tbsp Custard powder

  2. 2 tbsp cornflour

  3. 1 litre milk

  4. 1 cup + ½ cup sugar

  5. 1 tsp vanilla essence

  6. 1 apple chopped

  7. 1 mango chopped

  8. 250 g chikoo chopped

  9. 2 cups chopped pineapple

  10. 3 small bananas chopped

  11. 200g low fat cream


What you’re going to do:

1. Make a paste with the custard powder, cornflour and ½ cup milk.


2. Place the remaining milk with 1 cup sugar in a large vessel and bring to a boil.

3. 
Add the custard paste and keep stirring on a low flame for 3-5 minutes. (If you don’t stir, you’ll get lumps in your custard)

4. Turn off the heat and add vanilla essence and mix well.

5. Pour the custard into a large bowl and leave it to cool. When cool, place in the refrigerator to chill.

6. In the same pan, put in the chopped pineapple and ½ cup sugar and bring to a boil.


7. Lower the heat and leave it to simmer for approximately 15 minutes.


8. If it looks too watery, evaporate most of the water.

9. Put the pineapple in a bowl and leave it to cool.

10. When cool, add the remaining fruits, and place in the refrigerator to chill. At the same time, place the cream to chill as well.


11. When the custard, fruits and cream are thoroughly chilled, take it all out.

12. If the custard looks too thick and lumpy, use a hand blender to loosen it up a little.


13.Put the fruits into the custard and then add the cream and mix everything together well.


14. Pour into individual bowls and serve.

This is, without doubt, my favorite dessert :-) It’s so cool and refreshing, especially in the hot summer months or when breaking your fast after a long day of no eating and drinking. Another major plus: One of the best ways to get kids to eat fruit! Do try it out!

What They Should be Teaching in Schools Today

I’ve been thinking about this topic for quite some time now, long before starting this blog. So today being the eve of Independence Day and all, I thought I might actually put those thoughts into words and thus this post was born!

Everyone agrees that the kind of education we get in most Indian schools today is of hardly any use once we are out in the big bad world. So I have put together a list of subjects that I personally think all kids should be taught, regardless of gender, caste/religion, socio-economic conditions, school syllabus, medium of instruction etc. Ok, I am certainly no expert on this, so these points are purely based on my experience :-)

  1. Health and Nutrition

This should go beyond the ‘We should eat fruits and vegetables to stay healthy’. How many servings of each food should we eat a day, how can you determine how much a serving is, what are the benefits of each food group, what are the cons of consuming an excess of any food group. Also, portion control, the importance of eating at the right time every day, and preferably sample menus. Every kid should grow up informed and able to make healthy food choices.

  1. Basic Cooking Skills

It would be great if everyone could prepare a basic meal of rice, lentils and vegetables by themselves. For one, it would do away with the gender stereotype of women slaving away in the kitchen while men watch the news waiting for dinner. Then it would ensure that no one would have to depend on any one else for a healthy meal – you can cook it yourself!! It would also introduce kids with talent to a whole new world of opportunities.

  1. Yoga

I have yet to meet someone for whom yoga hasn’t been of any help (after consistent practice). It is a workout for which you require no equipment/shoes etc. It ensures health and mobility in old age and anyone, at any age, in any place can do it. It’s best for kids to get trained as early as possible.

  1. Self Defense

This is especially important for girls, for obvious reasons. Domestic violence is an ugly reality in many households in India, and a girl who can kick some a** will stand a better chance of good treatment in her marital home compared to a doormat.

  1. Basic Laws of the Land

These would include the very basic laws regarding women’s empowerment, crime against women, consumer rights, the RTI act etc. Here it would also be necessary to learn basic traffic rules and also the consequences of breaking seemingly trivial laws – urinating in public, spitting on the road etc. Kids need to learn that there really are laws for such things and fines to pay for breaking them.

  1. Basic Banking Operations

There are so many educated adults I know who seem kind of lost when they enter a bank. Every boy and girl needs to be acquainted with basic banking terms and what they can do in a bank. Financial independence, specially for women, is a necessity and everyone should be able to handle their finances intelligently by themselves.

  1. Use of basic tools

This is also true of a lot of ‘educated’ people. Many women leave the ‘light-bulb’ changing task to their men, and then crib about it when they take too long. So the use of basic hardware should help everyone take care of minor repairs themselves, instead of forever waiting for the plumber/electrician/carpenter to show up for every tiny thing that goes wrong.

  1. Sex education

This is a no brainer. I don’t care who thinks sex information is taboo, it needs to be communicated to all children in the right dose by the right experts and NOT the Internet. This should obviously include how to differentiate ‘right touch’ and ‘wrong touch’ and what to do in case of the latter situation. Prevention is always better than cure.

  1. Fundamentals of most common Indian religions

Religion is this huge, explosive topic in India, at the root of which lies a lot of ignorance. Teaching all kids (caste/religion no bar) about the fundamentals of the most common Indian religions will help in some level to gain an understanding about what their brothers and sisters of other religions believe in.  This should help in increasing tolerance and peace – 
after all, isn’t that what all religions ultimately preach?

  1. Environment Friendliness

The Earth is not going to solve its pollution problems by itself, we have to do it. And everyone needs to realize the gravity of the current situation and start acting upon it. There are a lot of simple things that even kids can do – avoid littering to begin with, recycling, avoid plastic bags/bottles, saving water, harvesting rainwater etc. Awareness from a very young age onwards is bound to ingrain these acts naturally in them.

  1. Basic courtesy and manners

Ok, this might seem superficial and unimportant, but the fact is that a lot of people consider Indians an uncouth and rude people. We might argue that we don’t want to judge ourselves by the Western standards of culture and refinement, but the truth is we definitely have room for improvement here. Kids should learn to be considerate of their fellow passengers, to stop yelling, jumping queues, pushing others to get through and in general making everything seem like someone else’s fault. Agreed, the sheer size of the Indian population makes it difficult, but isn’t a billion smiles better than a billion frowns?


Image Courtesy: shemford


Well, those are my views on this topic, but I know that this list is far from complete. What do you think they should be teaching in schools in India today? Do add your thoughts in the comments section!!

Accessory Organizers

I’ve always loved checking out how other women organize their closets, makeup, jewellery etc. on their blogs (Nosey, right? :-)). So, I thought I’d share some of my organizing solutions on my blog as well. Here goes!


Disclaimer: This is a picture heavy post!

1. Makeup Organizer

This little plastic organizer has little compartments that are perfect for a lipstick/mascara/kajal to fit in. It’s also got a drawer at the bottom for wider stuff. This clever little guy is from Dubai.


2. Cadbury Jewels Chocolate Box

This is to show how much I am into recycling :-). This box was a gift from an uncle. Once we finished up the goodies inside, we wondered what to do with the box – it looked too useful to throw away. And so it became a home for hair accessories. However, this doesn’t hold much, so I have the rest of my stuff stashed away in another Cadbury chocolate box!!


3. Bunny Basket

I got this basket from Crawford Market, Mumbai. I liked the bunny and the lace and didn’t really have a specific purpose at the time. I use it to put in sundry items like pins, a clip, phone etc.


Close up of the bunny pulling the basket:


4. Cutlery Tray

Yup, you read right, a cutlery tray! My drawers were a mess till I put this in. Now its all neat and organized.

5. Scarf and Belt Hanger

This red plastic hanger is really useful behind a cupboard door or on the wall behind the door. This one is from a store in Bangalore. 


6. Trouser Hanger

This Trouser Hanger from Big Bazaar comes in handy for heavier shawls and stoles. Also, it saves space since I can hang stuff in vertical layers.


7. Ferrero Rocher Box

I can hear you asking, “What’s with all the chocolate boxes?” Can’t help it, we have relatives abroad who always land at our place with boxes like these. And all the pretty boxes find alternate careers once the chocolates have gone their way :-). This one’s for my earrings. I might have to get another one soon, the pairs have begun waging war on each other!


8. Divided Plastic Box

This is a commonly available box with a lid and works for me since I don’t have a huge necklace collection and need to put just one or two pieces in each compartment.


9. Plastic Bangle Box

Another commonly available plastic commodity. It's not very durable however, and trying to get at a bangle stuck in the middle is a bit of a chore. Also, my chunkier wooden bangles don’t fit here.


10. Travel Makeup Pouch

Ok, this isn’t an organizing solution, just thought I’d show it here anyways :-).Got it as a gift.


Bonus two (not exactly my solutions :-))

11. Foldable Earring Box

This one came at an exhibition. It’s actually my Mom’s, I just sneaked it away for this post :-)


12. Wooden Bangle Stand

This one is my sister’s. She hangs her bangles, bracelets, necklaces all on this stand. I really like this and I’m gonna get one for myself soon. My Dad got it while on a train to Delhi. Honestly, you get some really cool stuff on Indian trains!!


So those were my (and Mom’s and Sis’) accessory organizers!! How do you guys organize your stuff? Do tell!!


This post is a participant in Org Junkie's 52 weeks of organizing. Check it out!